With the Contacts module, you are able to group your contacts according groups. This permits you to organize your contacts into related lists, such as Prospective Members, Sponsors, or Community Partners. Follow the steps below to add a contact to a contact group using the All Contacts page.
There are two different ways how to add contacts to groups.
First way: Adding contacts one by one:
Log in to your ClubRunner website and access the member area. From the member area, click on the Contacts tab.

Now, click on the Manage Contacts button.

This brings you to the All Contacts page where you will see a list of all your existing contacts. Select the contact you wish to assign to a group. To the right of their name, you will see drop down menu labelledView. Click on this, and then select Assign Groups.

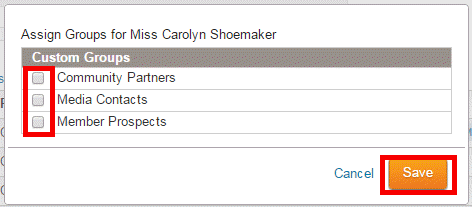
A pop-up window appears. Click on the checkbox next to every group to which you want to assign the contact. When you're finished, click Save.

The contact's group assignments are now displayed under the Groups column in the Contacts list.

Second way: Adding multiple contacts at once:
Log in to your ClubRunner website and access the member area. From the member area, click on the Contacts tab.

Then click on the Manage Groups link.

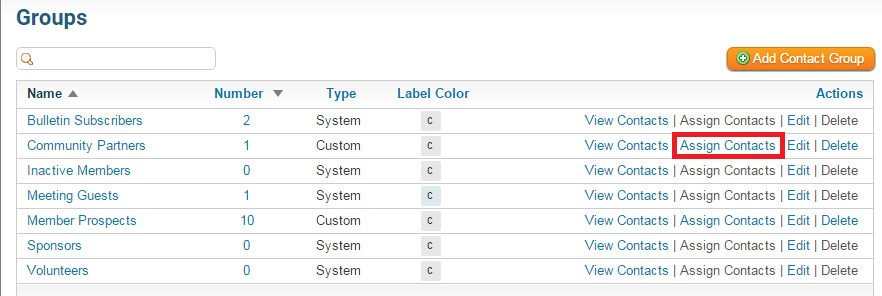
You are now on the Groups page. Click on Assign Contacts on the same row as the group you would like add contacts to.

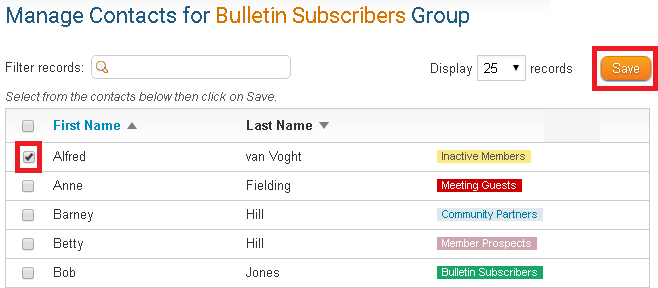
Click on the check-box beside each contact you would like to add. Once done, click the Save button.

This will take you back to the Groups page which will display a message saying: Success - Contact(s) were updated successfully.
