4. Building and Customizing Your Report
Once you have saved your report, it is time to begin building and customizing your report.
-
Click on the Edit Content link to the right of the report you to edit it.

-
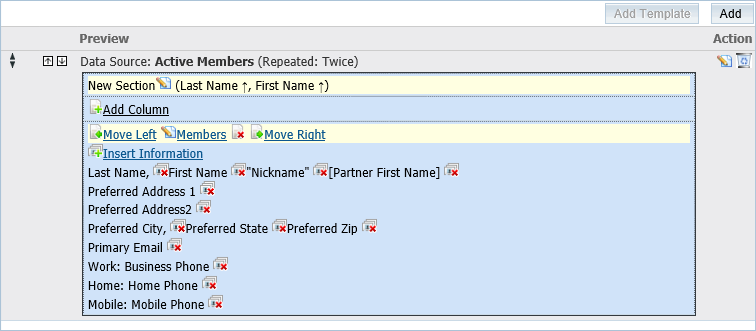
Once the page has loaded up, the report designer window will appear. The Report Content Designer will load up the report information onto the page, because you selected a template to work from. Please refer to the screen shot below:
-
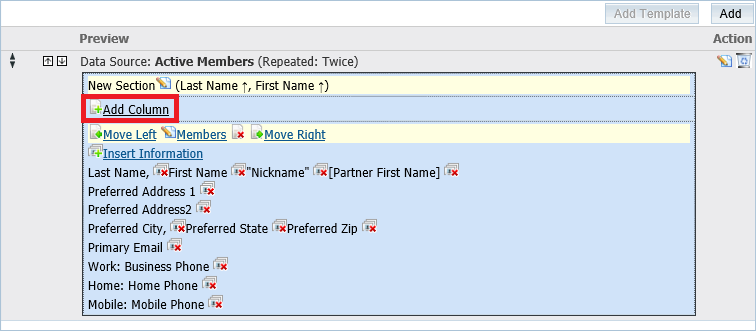
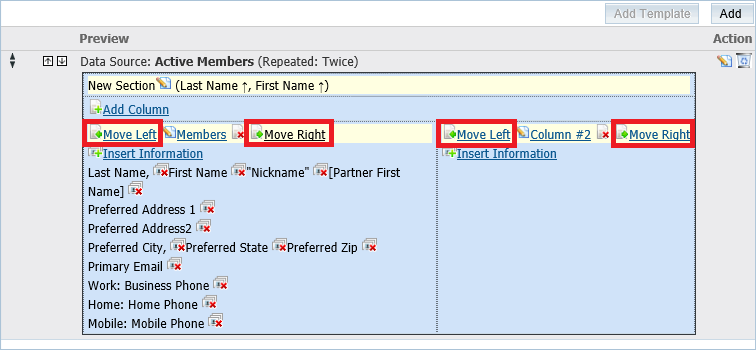
Clicking on Add Column allows you to create separate columns to divide your report. This works very similar to an Excel spreadsheet.
-
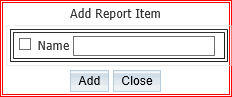
When you click on Add Column, you will notice the Add Report Item window opens. Click on the check box next to Name to have a title shown at the top of the column (Title of your list) and then type out the name of the column. Finally, click the Add button when you’re ready to add the column.
-
When adding a column to the report, the item will always appear in separate box split by a line to right. To adjust column order from left to right use the Move Left and Move Right links.
-
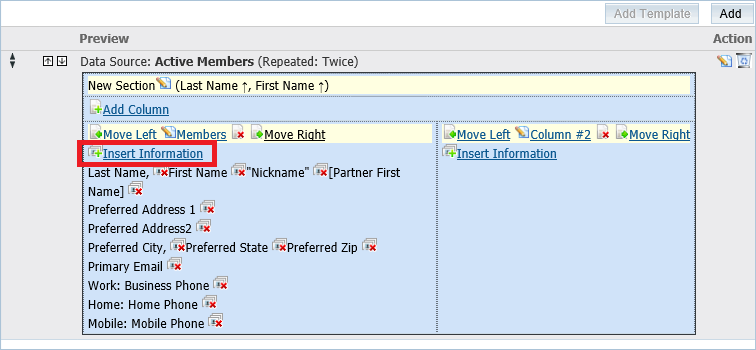
The insert information link provides the ability to select information from ClubRunner.
-
Within the Add Report Item window, the following options are available:
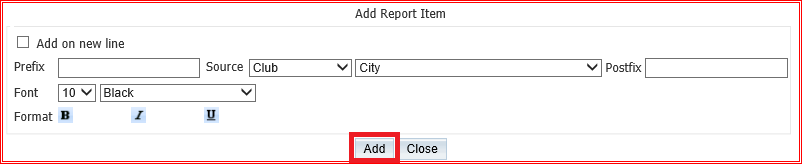
- Add on new line: Gives you the ability to move the information to the next line (Below the last added info).
- Prefix: Text you wish to appear before the information (Example: “First Name”)
- Source: This is the information from the database; this function can grab information from many places in ClubRunner. The chart on the next page shows the source and the fields available.
- Postfix: Text you wish to appear after the information.
- Format: Allows you to apply formatting to bold, underline and/or italicize the font.
-
Using these options, select and enter information you want added to the report. Once all changes have been applied, simply click the Add button.
-
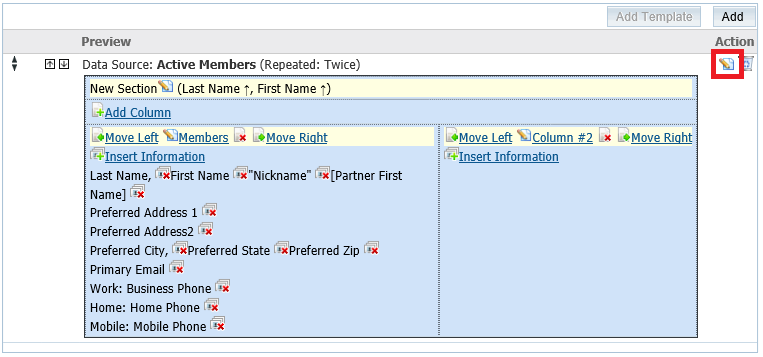
Once added, you can delete or edit the information added. To edit, click the words that appear in the box. To delete, click the red X icon.
-
To move the data/field to a different location on the report click on the edit icon on the right beside the trashcan.
-
This takes you to the Report Section Designer. Click on the edit icon on the right.
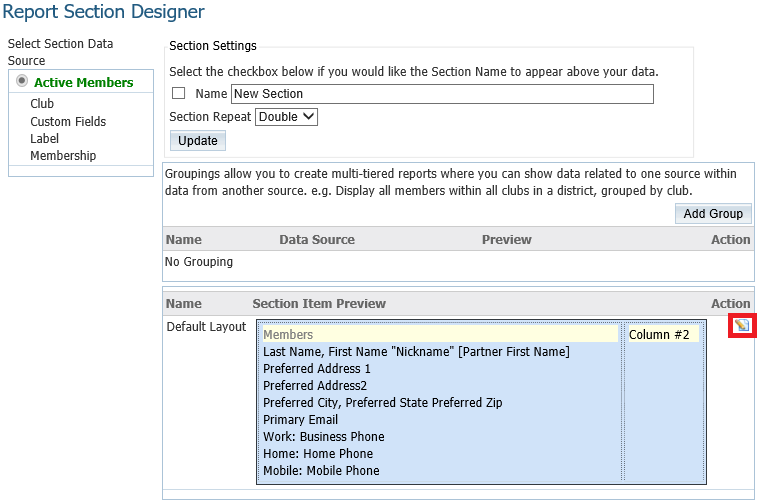
-
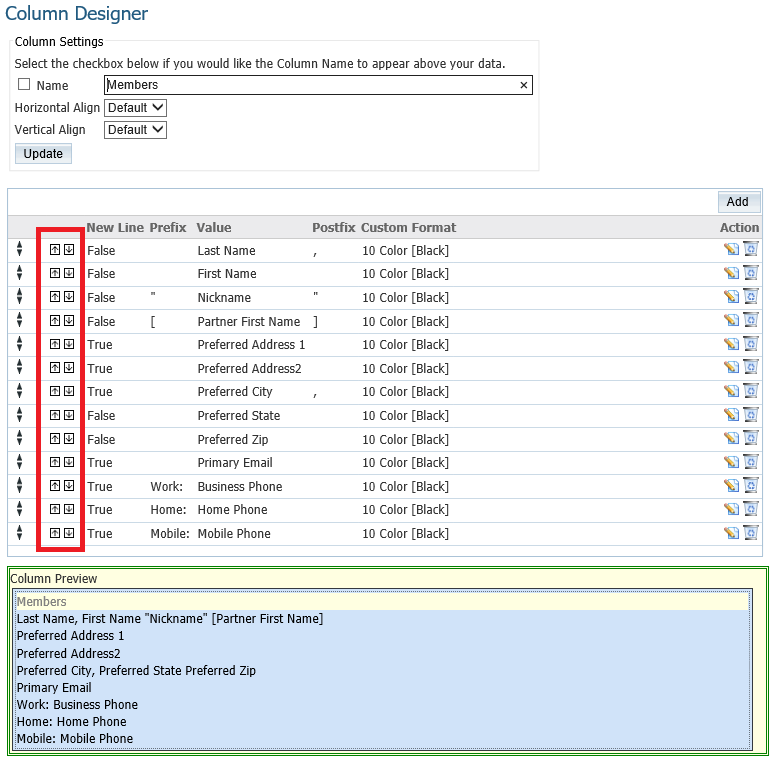
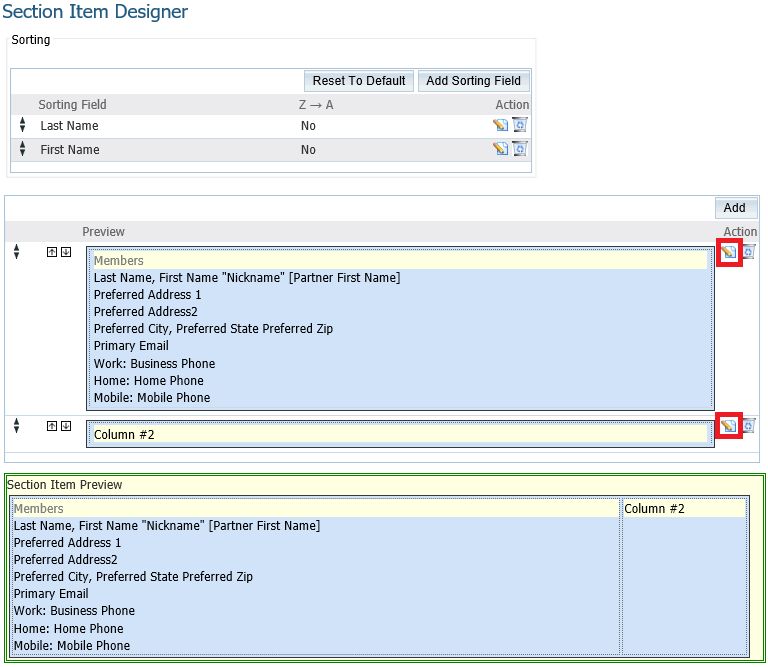
This will take you into the Section Item Designer. From here you can sort, delete, or edit a column. Click on the edit icon on the right beside the trashcan for the column you want to change.
-
This will take you to the Column Designer page. Click on the up or down arrows to move the data/field up or down. Once done, you can click on the Go Back button near the bottom of the page.