It is important to communicate with volunteers to ensure that they know what volunteer positions are available, what their task will be, as well as where and when their volunteer shift will take place. This article will give detailed steps on how to email volunteer invitations, how to email currently signed up volunteers, and how to configure the automatic notifications that are sent out to the volunteers.
-
Go to your Club’s website and login to ClubRunner. After you logged in, click on the Member Area near the top right to get to the Member Area.

-
Click on the Volunteers tab on the grey menu bar near the top.

-
Click on View Signup Lists.

-
From the Signup Lists page you can send invitations for specific signup lists, send emails to volunteers who are already registered and configure the notification settings. Click the links below for more information:
-
Send Invitations - Send invitations to members and contacts to signup for a volunteer shift.
-
Email Volunteers - Send a email to the volunteers who have already registered for a volunteer shift
-
Notification Settings - Configure the automatic notification sent to volunteers
-
Send Invitations
-
On the Signup Lists page, click the signup list you would like to invite members for.

-
Click the Recruit Volunteers tab under the name of the signup list you are viewing.

-
Click the orange Compose new message button.

-
From this page you can select who you want to receive this email as well as customize the email to your liking. For more information on sending an email, please visit our How do I send an email article and skip to step 8.
-
Once the email is set to your liking, you have the option to:
- Save as Draft: This will save the email as a draft, so that you can go back to edit the email later on.
- Send to Myself: This will send a copy of this email to you, so that you can review it.
- Send: This will send the email to the selected list of recipients.

Email Volunteers
-
On the Signup Lists page, click the signup list you would like to use to send an email.

-
Click the Email Volunteers tab under the name of the signup list you are viewing.

-
Click the orange Compose new message button.

-
From this page you can select who you want to receive this email as well as customize the email to your liking. For more information on sending an email please visit our How do I send an email article and skip to step 8.
-
Once the email is set to your liking, you have the option to:
- Save as Draft: This will save the email as a draft, so that you can go back to edit the email later on.
- Send to Myself: This will send a copy of this email to you, so that you can review it.
- Send: This will send the email to the selected list of recipients.

Notification Settings
-
On the Signup Lists page, click Notification Settings on the left hand side menu.

-
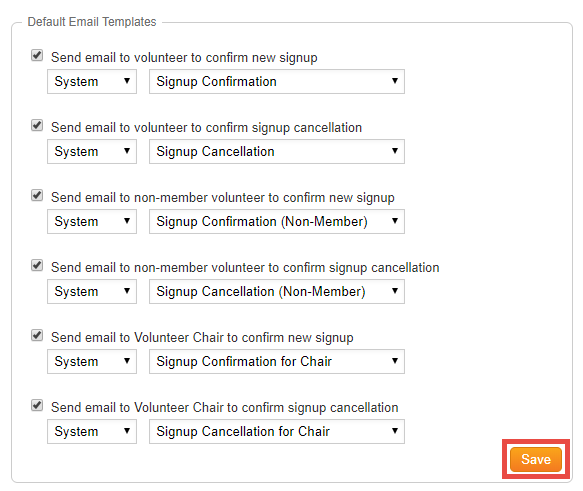
From this page you can select which notification emails you would like to automatically send to the volunteers by checking the checkbox.

-
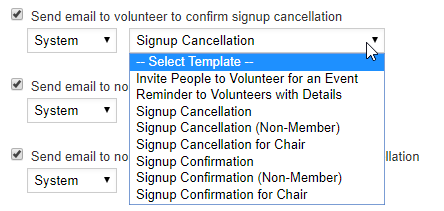
You could also select which template you would like to use for that specific notification by selecting System or Custom from the first dropdown menu.

-
Then select which template you would like to use in the second dropdown menu.

-
Once you are done, please click the orange Save button on the bottom right.

