ClubRunner has a built-in email feature that allows you to email fellow members and non members. Their email addresses are stored in ClubRunner so you do not have to know them.
You can access the Email Message Center from your club's home page. Here, you can compose emails and view the emails you have sent.
Note: There is an limit of 500 past emails that will appear in the Email Message Center area.
Note: The Email Message Center does not act as an inbox. To view messages you have received, you must access your personal email.
-
To access Email Services, you must go to your club homepage and log in. To do this please click the Member Login link near the top right.
-
After you enter your login name and password it will return you back to the Club's homepage. Click Member Area near the top right.
-
Along the top of the screen you will see several tabs. Click on the My ClubRunner tab.
-
Now, click on the Email Message Center.
-
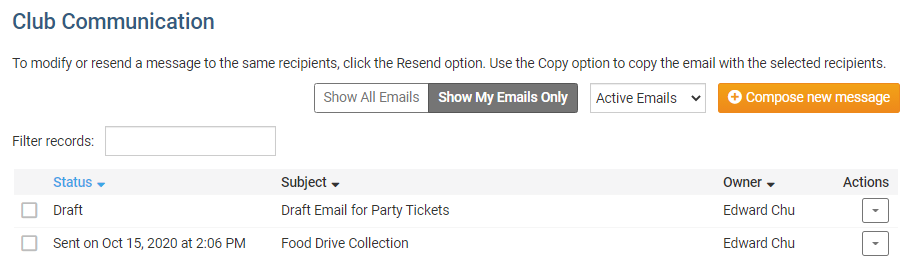
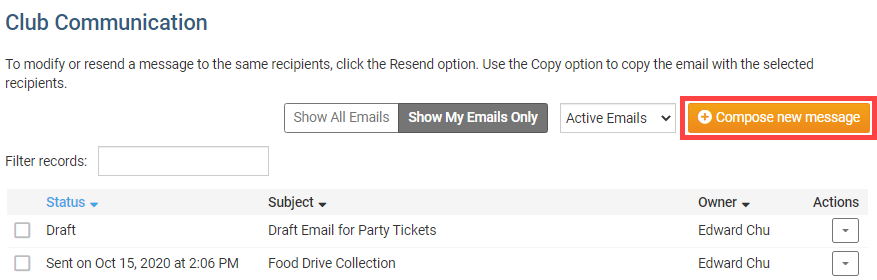
You are now on the Club Communication screen. Here, you can compose emails and view emails you may have sent.
Note: Only Club level access "30 - Site Administrator" can see "Show All Emails" and "Show My Emails Only". If any other member views this page it will only display their own emails.
-
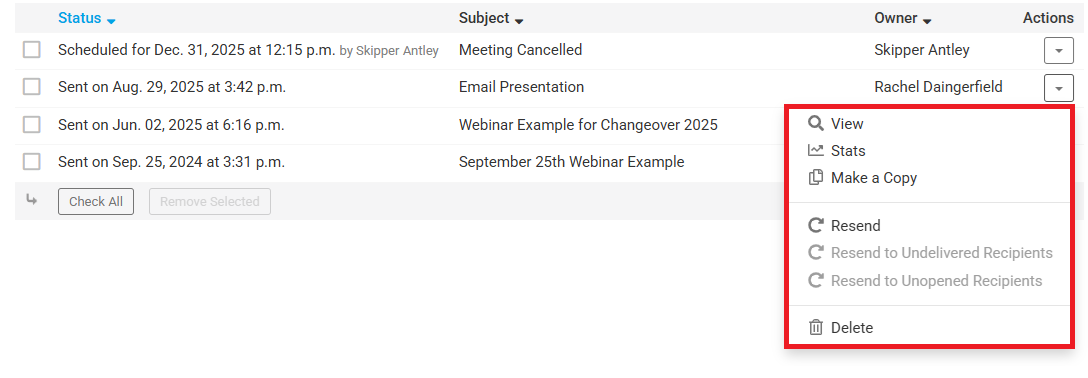
To review the actions you can make on an email among the Club Communication list, click the Drop-down Arrow in the actions column.

-
Among the actions, click on the View button next to the appropriate email. You may also view the email Stats, Make a Copy of the text, Resend the email to all or undelivered/unopened recipients, or Delete it, using the buttons on the same line.
Note: If you use the Resend options it will let you edit the email but not remove or add recipients. If you need to change the recipients please use Make a Copy.
-
If you have a draft email in progress, you may open for editing or delete it by clicking the Open or Delete buttons next to the relevant message.

-
To create a new message, click on the orange button marked Compose New Message just above the email view field.
-
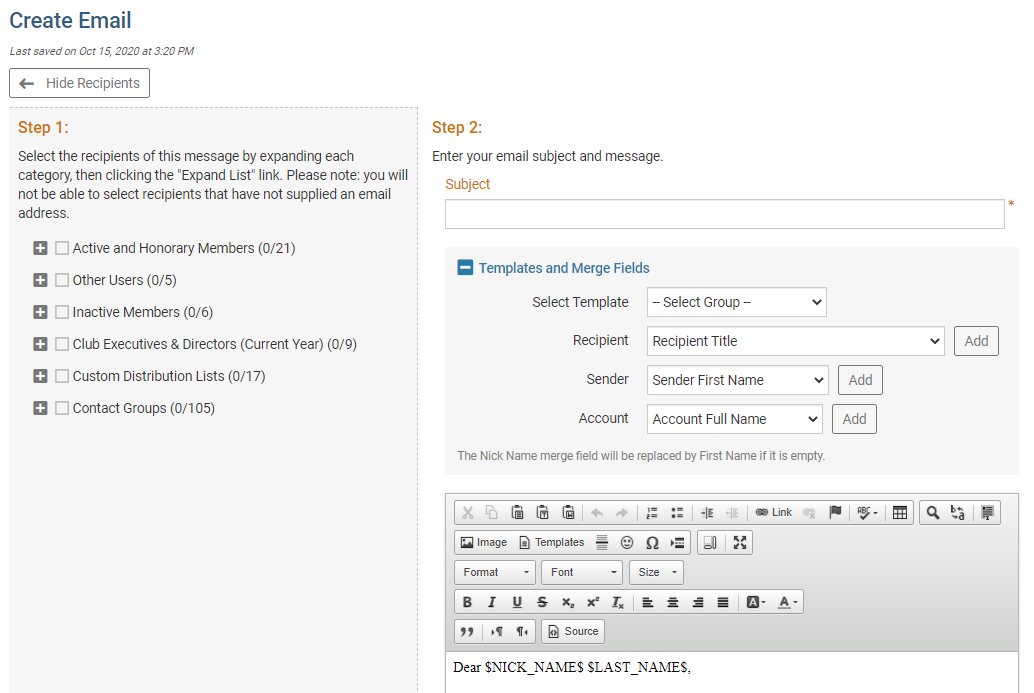
You are now on the Create Email page. Here, you can compose a message to your fellow club members or non-member friends and contacts in the club database.
-
Follow the steps on the screen to compose a new email. First, you select the recipients by clicking on the buttons to expand the member lists. You can select individual members, or choose to send messages to everyone in a given list. In this case, we have selected to send our email to all the active members of the club.
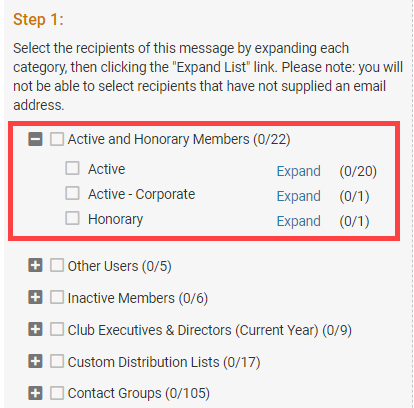
Note: If you are a listed Club Executive from the Club Executives list , and the position is an 'Executive' type on the District (Example: President, Secretary, or Treasurer), the Club Executives & Directors (Current Year) contact group will be available to email other current year Executives within the District.
-
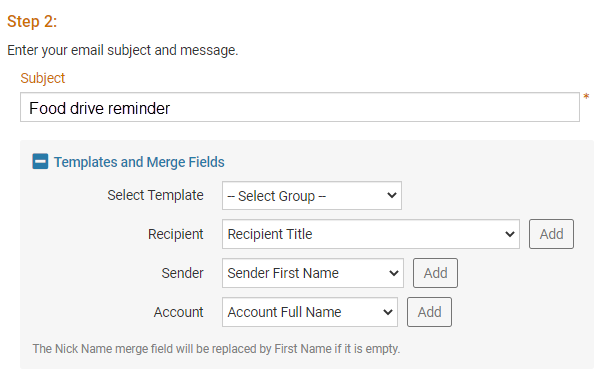
Now, write the subject of your email in the space provided.
-
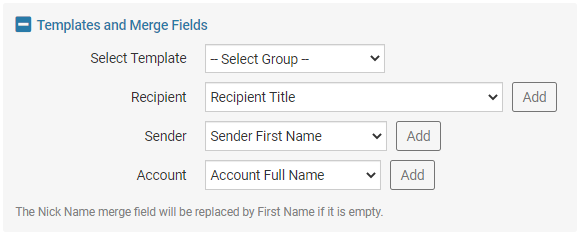
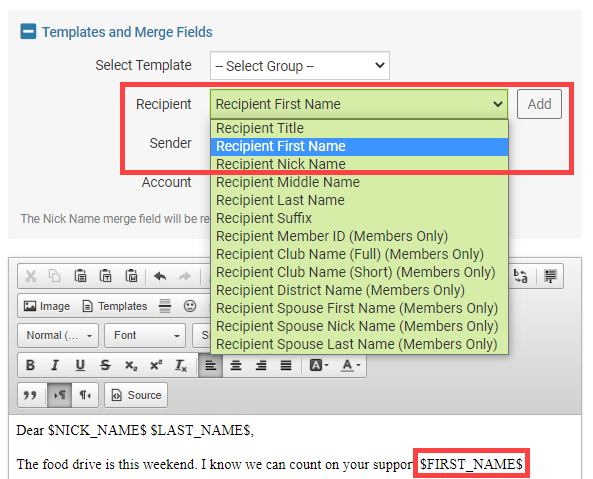
Your email is automatically generated with a greetings to the recipient that includes their first name and last name. You can change this information using the Insert Mail Merge Fields feature. This feature also allows you insert the recipient's name or other information in the body of the email.
-
For example, if you wish to refer to your recipient by first name in the body of the email, select Recipient First Name from the Recipient menu and click the Add button at the appropriate point in your email. This adds a piece of code, which tells ClubRunner to insert the member's first name from your club database when the email is sent. The person who receives your email will see their name, and not the code.
-
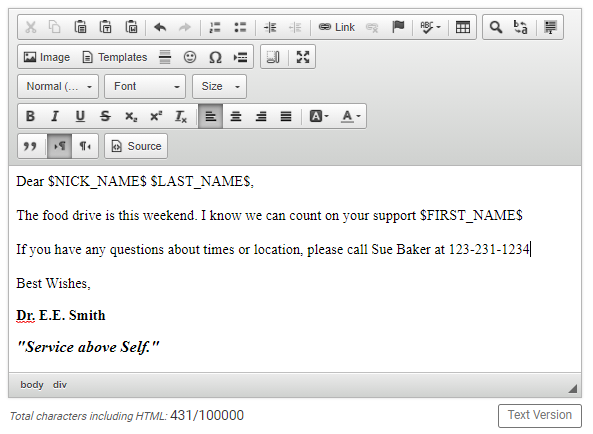
Compose your message. You can use the buttons above the writing field to edit your fonts and text style, and to add images and links.
-
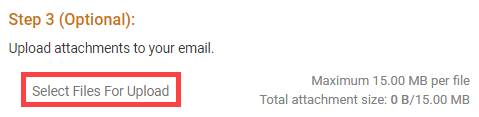
You now have the option to add a file attachment to the email. This could include photos or documents relevant to the email. To add a file, click Select Files for Upload. You can then choose files from your computer. The files cannot be larger than 15 MB in total.
-
Next, you have the option to Include link to list of recipients, and/or to send a copy to yourself, by clicking on the indicated check boxes. Including the link to the list of recipients will include a link to view the list of recipients in the footer of the email.

-
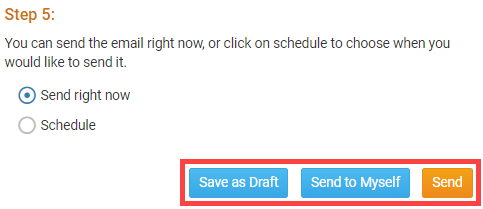
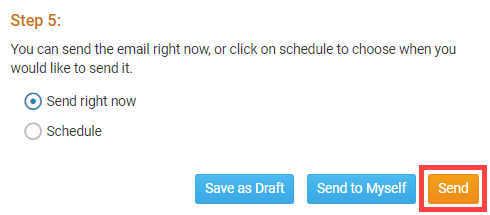
You can choose to send your email immediately, or at the time of your choosing. To send the email now, leave the Send Right Now button checked, and click Send.
-
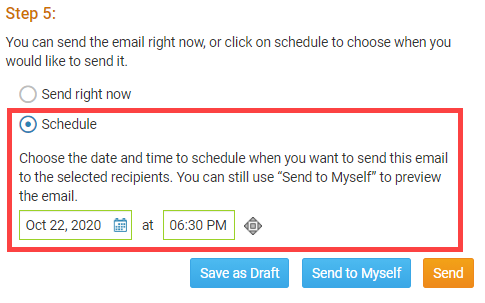
If you want to send the email later, select Schedule and enter the time and date you wish your message to go out. Then click Send, as noted in the previous step.
-
Finally, you have the final options for sending your mail. Click on the relevant button.
Send Email Options: There are three sending options when it comes to emails:
-
Save as Draft: Will save all the details of the draft email (including recipients) so you can edit it later.
-
Send to Myself: Will only send the email to the member that is logged in for verification purposes.
-
Send: Will send the email to the selected recipients.